Skip to Main Content

Kit Instructions

Under Construction - more to come soon!

Kitchen-in-a-box kits

Values & Benefits of Library Cooking/Food Programs

Educational Benefits

  • Promotes literacy skills by incorporating cookbooks, reading recipes, and discussing food history.
  • Encourages STEM learning through measuring, chemical reactions (baking), and food science.
  • Supports cultural awareness by introducing global cuisines and food traditions.
  • Helps teach basic life skills like meal prep, budgeting, and kitchen safety.

Health & Wellness

  • Encourages healthy eating habits by teaching nutrition and balanced meal planning.
  • Supports food security initiatives by providing cooking tips on a budget and discussing local food resources.
  • Provides hands-on learning about fresh, whole foods, reducing reliance on processed meals.

 Community Engagement & Social Benefits

  • Brings people together over a shared love of food, fostering community and conversation.
  • Helps multigenerational learning, where families can cook together and share traditions.
  • Provides a space for food storytelling, allowing participants to share personal and cultural food experiences.

Economic & Practical Benefits

  • Teaches budget-friendly cooking, helping patrons save money on meals.
  • Supports career exploration for those interested in culinary arts.
  • Encourages local partnerships with farmers, chefs, or businesses.

Library Cooking & Food Program Ideas

Healthy Eating & Budget Cooking

  • $10 Meal Challenge – Teach patrons how to create healthy meals for under $10.
  • Meal Prep 101 – Show how to plan and prep meals for the week.
  • Food for Health – Programs focused on heart-healthy, diabetic-friendly, or plant-based meals.
  • Aldi Haul Challenge – Teach how to grocery shop on a budget using a local grocery store’s weekly deals.

Cultural & Historical Food Programs

  • Cook the World – Feature a different country each session and prepare a small traditional dish.
  • History Through Food – Discuss historical foods (e.g., Depression-era meals, medieval cooking, or Civil Rights-era foods).
  • Southern Food Stories – Invite community members to share their family’s traditional recipes.

Hands-On Cooking & Food Science

  • No-Cook Cooking – Teach simple recipes that require no stove or oven (great for all ages).
  • Food Science Fun – Demonstrate how yeast makes bread rise, or why we caramelize sugar.
  • DIY Spice Blends – Let patrons create their own taco seasoning, Italian herb mix, or flavored salts.

Literacy & Cooking

  • Storytime & Snacks – Read a picture book and make a simple snack inspired by the story.
  • Cookbook Club – Choose a cookbook each month, let patrons try recipes, and host a book discussion.
  • Food-Themed Book Club – Pair a fiction book with a related recipe (e.g., reading Chocolat and making truffles).

Gardening & Sustainability

  • Grow & Eat – Teach how to grow herbs or veggies in small spaces, then use them in simple recipes.
  • Preserving the Harvest – Demonstrate easy pickling, jam-making, or dehydrating techniques.
  • Composting & Food Waste Reduction – Educate on how to reduce food waste and compost scraps.

Family & Kids Cooking Fun

  • Decorate & Create – Cupcake or cookie decorating workshops.
  • Edible Science Experiments – Make rock candy, butter, or homemade ice cream in a bag.
  • Cooking with Kids – Hands-on classes where families can make simple, kid-friendly meals together.

Cooking and Food-Related Program Ideas by Age Group

Kids (Ages 3-7) – Early Literacy & Hands-On Fun
*Focus: Simple, sensory-friendly activities that build basic cooking skills, literacy, and creativity.

  • Storytime & Snacks – Read a picture book and make a related snack (If You Give a Mouse a Cookie + no-bake cookies).
  • No-Cook Cooking – Simple, safe, no-heat recipes like fruit kabobs, yogurt parfaits, or sandwich art.
  • Edible Science Experiments – Make butter in a jar, homemade ice cream in a bag, or fizzy lemonade.
  • Decorate & Create – Cookie or cupcake decorating with edible art.
  • Grow & Eat – Let kids plant an herb (like basil) and teach them how to use it in a simple snack.

Tweens (Ages 8-12) – Hands-On Learning & Food Science
*Focus: Developing independence in the kitchen, STEM learning, and creative exploration.

  • Food Science Fun – Explore how yeast makes bread rise, why popcorn pops, or how sugar caramelizes.
  • DIY Spice Blends – Let kids mix their own taco seasoning, Italian herb mix, or popcorn seasoning.
  • Cooking Around the World – Feature a different country each session and make an easy dish like guacamole (Mexico) or hummus (Middle East).
  • Healthy Snack Hacks – Teach kids how to make fun, balanced snacks like homemade granola bars or smoothie bowls.
  • Book & Cook – Pair a middle-grade book with a themed snack (Harry Potter butterbeer, Percy Jackson ambrosia).

Teens (Ages 13-18) – Independence & Life Skills
*Focus: Teaching real-world skills, nutrition, and creativity in a fun, social setting.

  • Meal Prep 101 – Teach teens how to plan and prep easy, affordable meals.
  • $10 Meal Challenge – Challenge them to create a meal for under $10 using budget-friendly ingredients.
  • Aldi Haul Challenge – Show how to shop for a week’s worth of groceries on a tight budget.
  • DIY Boba & Drinks – Make bubble tea, matcha lattes, or fruit-infused drinks.
  • Bake-Off Challenge – A fun baking competition with themes like “Best Cookie” or “Cupcake Wars.”
  • Teen Cookbook Club – Choose a cookbook, have participants try recipes, then discuss their results.

Adults – Cooking, Budgeting & Cultural Learning
*Focus: Expanding culinary skills, budgeting, health, and cultural appreciation.

  • Cook the World – Each session highlights a different cuisine with a small tasting.
  • History Through Food – Discuss historical foods (e.g., Depression-era meals, medieval cooking).
  • Food for Health – Heart-healthy, diabetic-friendly, or plant-based cooking workshops.
  • Preserving the Harvest – Teach pickling, jam-making, or dehydrating techniques.
  • Grocery Shopping on a Budget – Tips for meal planning and smart shopping.
  • Composting & Food Waste Reduction – Learn how to minimize waste and compost kitchen scraps.

Intergenerational & Family Programs
*Focus: Bringing families together to cook, learn, and share experiences.

  • Family Cooking Night – Parents and kids cook a meal together with guided instruction.
  • Cooking with Grandparents – Invite older generations to share family recipes and food traditions.
  • Cultural Food Festival – Families bring dishes from their cultural backgrounds to share.
  • Harvest Party – Seasonal food activities like apple tasting, pumpkin decorating, or making homemade cider.

Kitchen-in-a-box Kit - Large


NINJA Professional Blender

Owner's Guide

Inspiration Guide

How To Assemble The Pitcher

Making Snow


How to use Longzon Knife Sharpener


ThermoPro Digital Food Thermometer

Instruction Manual


FAGOR Induction Cooktop manual


Presto 22-inch Electric Griddle with removable handles

Instructions in English and Spanish


Kitchen-in-a-box Kit - Small

Inventory Check List


Immersion Hand Blender

Amazon.com: FKN Immersion Blender 4 Interchangeable Blades,2-Tip  Blade,Ice-Crushing Blade,Potato Masher,Milk Frother Maker are all suitable  for the FK2201-B3, FK2201-B1(black),FK2201-B1-1 model Hand Blender

Types of mortar

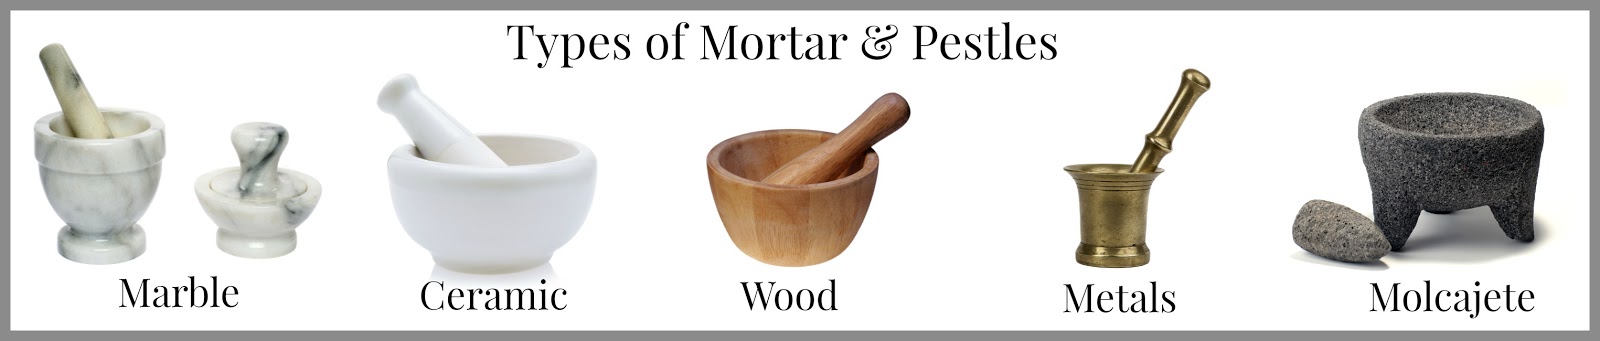
Mortar and pestle sets come in various materials like granite, marble, ceramic, and wood, each with unique properties affecting their suitability for different tasks, such as grinding spices or herbs. Depending on the material they are constructed from, changes the levels of porousness and texture. Porcelain ones make better for wet or oily ingredients, while others (like wood) absorb moisture and odor.

Key differences:

  • Granite: Known for durability and a rough surface, granite mortars and pestles are effective for grinding hard ingredients like spices and seeds. 
  • Marble: Smoother than granite, marble mortars are better for softer ingredients or making pestos, but can stain with certain ingredients. 
  • Ceramic: Porcelain mortars and pestles are good for wet or oily ingredients, as they are non-porous and easy to clean.
  • Wood: Wood mortars and pestles are porous and can absorb moisture and odors, making them less suitable for wet or oily ingredients. 
  • Other Materials: You might also find mortars and pestles made of cast iron or glass, each with its own advantages and disadvantages. 

Mortar and Pestle Do’s and Don’ts

Do’s

  • Season new mortars – If using an unseasoned stone mortar (like granite), grind dry rice until it remains white, then grind garlic and salt to remove stone dust.
  • Use the right material – Granite for hard spices, marble for softer ingredients, and wood for herbs and pills.
  • Grind in a circular motion – This helps break down ingredients effectively.
  • Add coarse salt when grinding – Helps break down fibrous materials like garlic and herbs.
  • Clean properly – Rinse with warm water and scrub with a brush; let air dry completely.
  • Store dry – Prevents mold or mildew from forming.

Don’ts

  • Don’t use soap – Especially on stone or porous materials; it can absorb the scent.
  • Don’t grind oily substances first – They can coat the surface and make grinding harder.
  • Don’t use metal utensils – They can damage softer mortars.
  • Don’t leave wet for too long – Wood and porous stone can absorb moisture and develop mold.
  • Don’t mix strong-smelling ingredients – Unless you clean well, previous smells can linger.
  • Don’t use a dishwasher – The high heat and detergent can damage the surface.

How to Clean a Porous Mortar and Pestle

Daily Cleaning (After Each Use)

  1. Rinse Immediately – Dump out any leftover bits and rinse with warm water.
  2. Scrub with a Brush or Sponge – Use a stiff brush or non-metal scrub pad to remove residue. Avoid metal pads as they can damage the surface.
  3. Use Coarse Salt & Water (if needed) – If there's leftover oil or strong smells, grind a handful of coarse salt with a little water to absorb any residue. Rinse again.
  4. Air Dry Completely – Let it air dry in a well-ventilated area. Avoid leaving it damp to prevent mold.

Deep Cleaning (For Stains or Strong Odors)

  1. Make a Baking Soda Paste – Mix baking soda with water to form a paste. Spread it inside the mortar, let sit for 10 minutes, then scrub and rinse.
  2. Grind Uncooked Rice – Pour a handful of dry white rice and grind it into powder. If the rice turns dark, repeat with fresh rice until it stays white. This helps remove lingering flavors.
  3. Lemon & Salt Scrub – For strong odors, rub the inside with a cut lemon and a sprinkle of coarse salt, then rinse and dry.

Common Uses for a Mortar and Pestle

Spices & Herbs

  • Grinding whole peppercorns, cumin, coriander, or fennel seeds
  • Crushing garlic, ginger, and chili for pastes
  • Making pesto (basil, garlic, pine nuts, and cheese)

Sauces & Dips

  • Guacamole
  • Salsa
  • Aioli

Pastes & Seasoning Blends

  • Thai curry pastes (red, green, or yellow)
  • Gremolata (garlic, lemon zest, parsley)
  • Chimichurri (parsley, garlic, vinegar, oil)

Other Uses

  • Crushing nuts for baking
  • Grinding salt or sugar for finer texture
  • Breaking down dried herbs for tea or seasoning
  • Making flavored salts (like rosemary or citrus salt)

Dry and liquid measuring cups, while both used for volume measurement, are designed differently: dry cups are for leveling off dry ingredients, while liquid cups are for pouring and measuring liquids, often with a spout and wider shape for ease of use. 

Conversion Charts:


Steramine Multi-Purpose Sanitizer - 150 Tablets | Dive Gear Express® Winco PPL-6R Cleaning Bucket 6 qt. Red Sanitizing Solution  

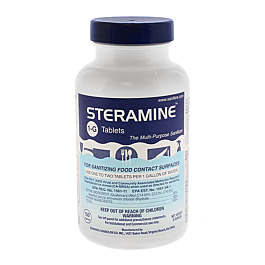
Steramine tablets and red disinfectant bucket

Directions for sanitizing tablets


Chlorine Test Strips, 10-200ppm, 100/pack, Indigo

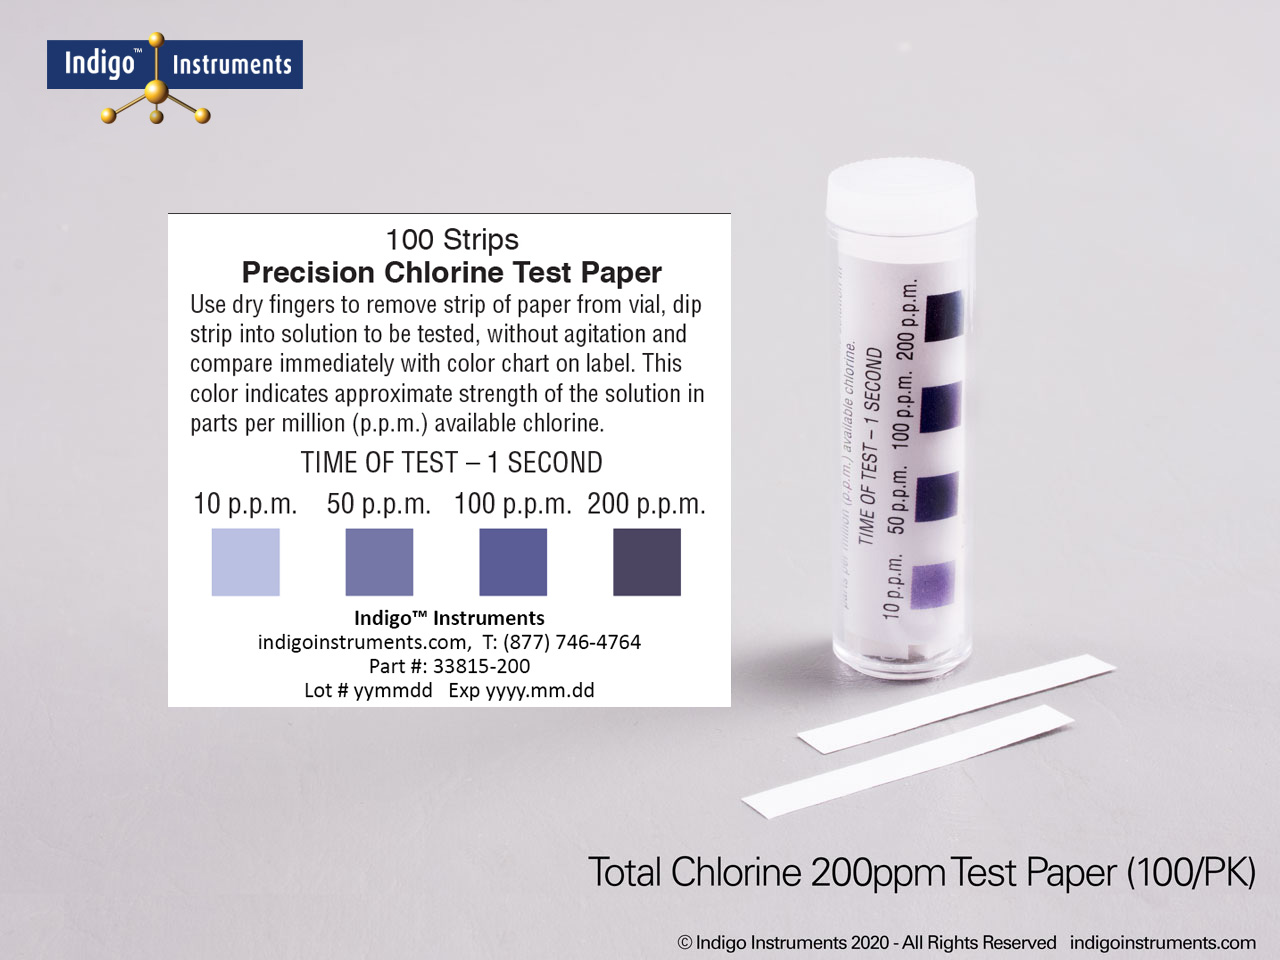
Chlorine test strips

To use chlorine test strips in the kitchen for sanitizing solutions, dip the strip into the solution, remove it immediately, and compare the color of the strip to the color chart on the vial to determine the chlorine concentration. 

Extra guidance:
Preparation:

  • Ensure the test strip is dry and free from contamination. 
  • Check the expiration date of the test strips and the color chart. 
  • Make sure the test strip is designed for sanitizing solutions, not pool or drinking water. 

Testing:

  • Remove a test strip with dry fingers, and close the vial immediately to prevent moisture from affecting the strips. 
  • Dip the test strip into the sanitizing solution for a few seconds (2-10 seconds, depending on the manufacturer's instructions). 
  • Remove the strip immediately and do not agitate. 
  • Compare the color of the strip to the color chart on the vial. 

Color coded cutting mats

Color-coded cutting mats, like color-coded cutting boards, are used to prevent cross-contamination by assigning specific colors to different food types. As you can see from the illustration on each mat, blue is for seafood, red is for beef, yellow is for chicken, and green is for vegetables. 


Silicone Cooking Pinch Grips

Made of high quality food grade materials, these silicone cooking pinch grips have thick heat-resistant insulation padding. They can help you safely hold hot items in the kitchen or by outdoor grill.